Creating Users
 Updated
by
Tony Runyan
Updated
by
Tony Runyan
Creating Users
Client Users
- Navigate to System > Users then click Client Users at the top right of the page.
- Click on Add New Client User at the top right of the page.
- Once you’ve filled out the required fields you may also choose how to grant the new user a password. The options available are to send them a reset password link, or specify a password for them in two additional hidden fields.
- If you would like to setup the account in advance but leave it inaccessible then you would set “This account is” - Inactive.
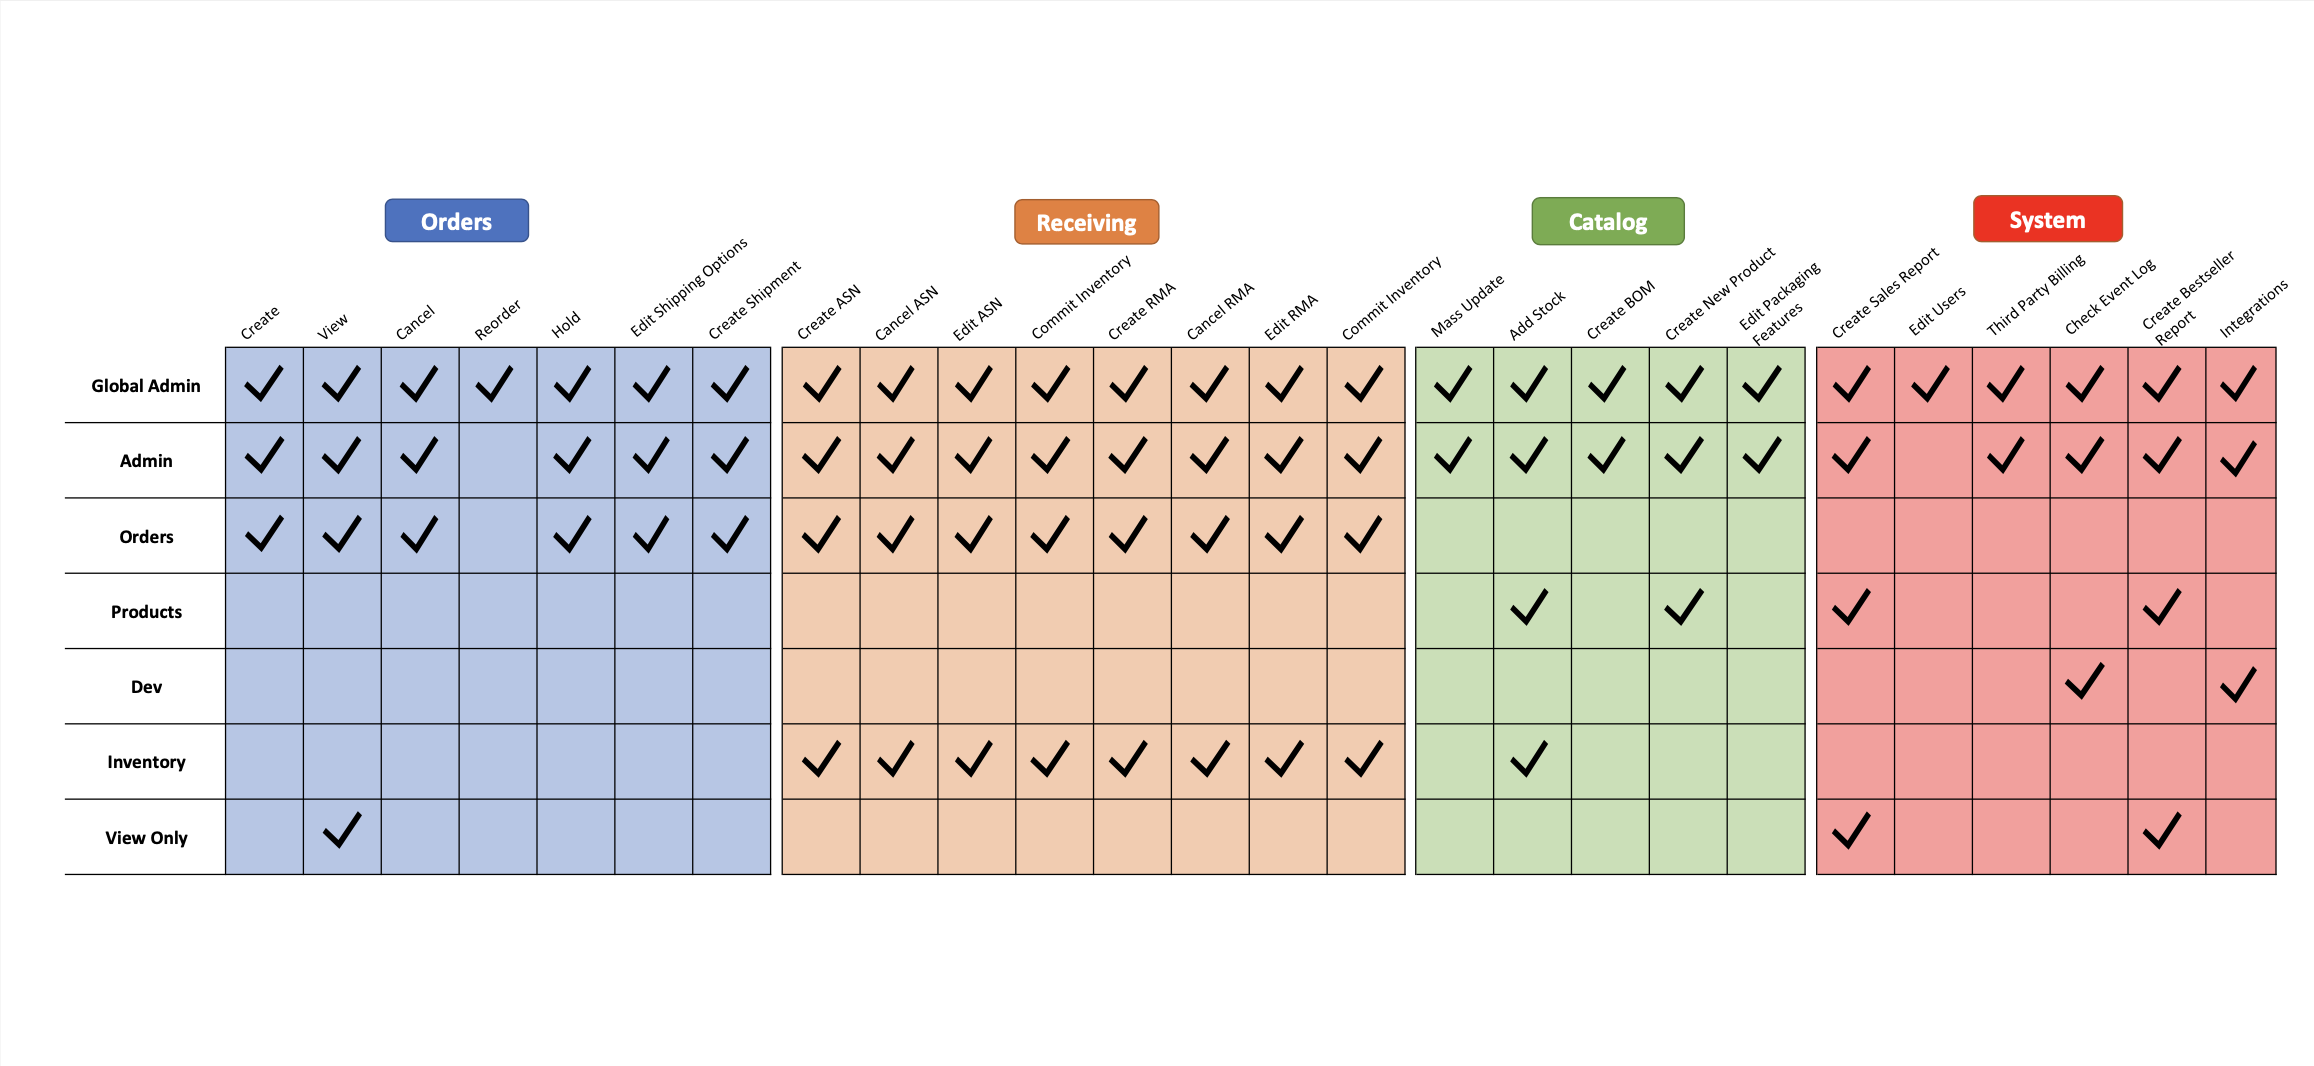
- On the left side menu, you will notice a User Role section. If you click this section you can choose one of your predefined user roles here. If you don’t have the user role setup yet, you will need to do that by navigating to System > Users then clicking User Roles beside the Add New User button.
- If you are happy with the settings, click Save User.
Editing Users / Client Users
Administrators and Client Administrators may edit a User or Client User. To do so, click on their row in the main grid view. From here you may change any information except the Merchant they are associated with.
The administrator may also delete a user from this screen by clicking Delete User at the top right of the “Edit User” pane.
If a user needs a password reset link, this can be sent automatically using the Send Reset Link button on the top right of the “Edit User” pane. This will be sent to the email address saved for the user.
Don't forget to click Save User to save the changes.
The User Grid
The User Grid shows the following data on each user:
- ID
- User Name
- Full Name
- Role
- Status